QAD Enterprise Asset Management 2017.1
>
User Guide
>
Inventory
>
Inventory
>
Review Part Reserve Analysis
Review Part Reserve Analysis
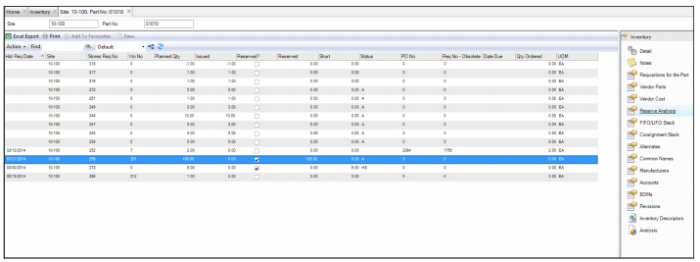
The Reserve Analysis submenu displays all reserved quantities for a part for specific stores requisitions. This submenu displays:
• The number of parts reserved
• Date required
• Number of parts short
• Any purchase orders and requisitions attached to a transaction
Inventory: Reserve Analysis Submenu
Reserve/Unreserve Parts
To reserve a part, open the part record and select the Reserve Analysis submenu. Highlight the correct line and select Reserve from the Action menu:
• If the quantity needed is less than the quantity available, the status changes to A (available) and the reserved quantity equals the planned quantity.
• If the quantity needed is more than what is available, the status changes to HS (Hold Short) and there is a short quantity.
• If a work order is canceled or closed, EAM automatically eliminates the demand for the part and the entry from the screen.
• If work is postponed, you may want to unreserve your parts. Doing so frees up the reserved parts for other requests.
To unreserve a part, highlight the line in the Reserve Analysis submenu and select Unreserve from the Action menu.
Create a Requisition for an MRO Part
EAM gives you the ability to create requisitions for an MRO part from the Inventory browse. When you create a requisition from the Inventory browse, EAM automatically creates a requisition header with the MRO part added as the requisition line. The part information defaults into the requisition so you do not have to create a requisition header in the Requisition module before you add the line. If a requisition has been created from a part record, the requisition is directly tied to the part record and the associated requisition numbers appear in the Requisitions for the Part submenu.
Follow these steps to create a requisition for an MRO part:
1 Open the Inventory browse.
2 Highlight the part record and select Create Requisition from the Inventory Action menu.
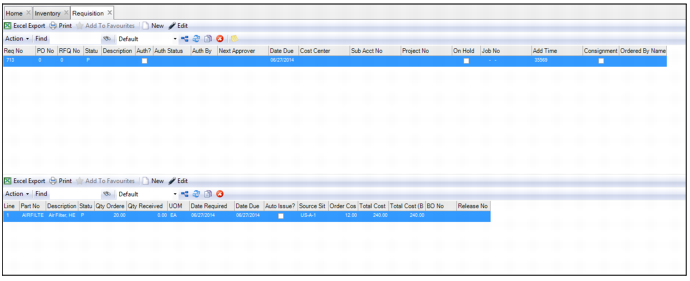
3 The system creates a requisition header with the MRO part added as the requisition line.
Inventory: Analysis Submenu
4 Double-click the requisition header to open. Complete the requisition by filling out the rest of the information in the requisition header and line. See
Creating a Purchase Order.