QAD Enterprise Asset Management 2017.1
>
User Guide
>
Finance
>
Groups
Groups
Use groups to restrict purchase requests to valid accounts and cost centers. You can develop groups of users with project approval limits.
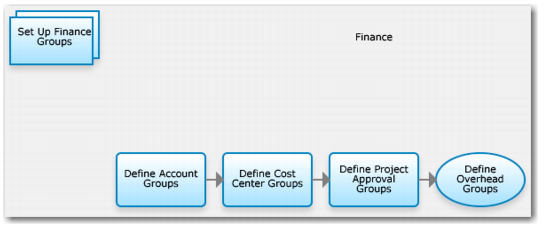
Setting Up Finance Groups
Finance Group Process Flow
1 Define account groups.
2 Define cost center groups.
3 Define project approval groups.
Account Group
Use account numbers with the account group. Use the account group code with the user ID.
Create and name an account group, typically generalizing the type of users that are associated with it. Add a list of account numbers to that group on the lower browse.
Associate the account group with any selected user IDs, under System Administration|Users|Account Groups. You can associate multiple account groups with the user ID.
When the user selects the Authorize action in Requisitions, the system validates the associated account group or cost center group in the requisition with the user permissions. If the system finds the proper permissions, the requisition approval process begins.
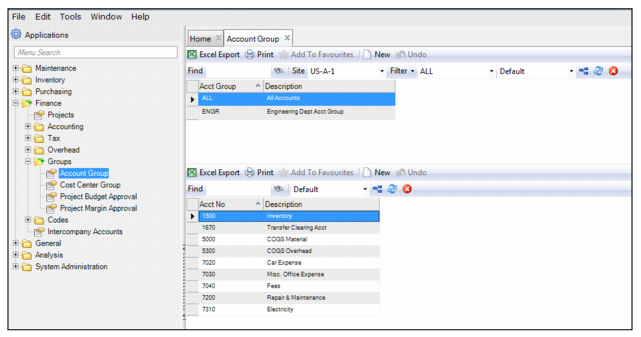
Account Group Browse
Access this browse from Finance|Groups|Account Group. Organize and display records, access supporting functions, edit, or create new records, and export to Excel.
Account Group Browse
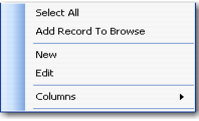
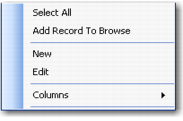
Account Group Right-Click Menu
The right-click menu contains administrative functions and options from the Action menu.
Account Group Right-Click Menu
New
Use New to open the account group record detail to create a record.
Edit
Use Edit to open the account group record detail to edit the selected record.
Columns
A list of columns available to the browse displays here. Select a column header to display it. Clear the column header to hide it.
Creating a New Account Group
1 Click New in the upper browse.
2 Enter the account group name and description.
3 Click New in the lower browse.
4 Select an account code from the lookup. Add as many accounts as you need.
Editing an Account Group Record
1 Double-click a record from the browse to update the account group description.
2 Enter or edit the account group description.
3 Click New or Delete to add or remove accounts from the group.
Cost Center Group
Use cost centers with the cost center group. Use the cost center group code with the user ID.
Create and name a cost center group, typically generalizing the type of users to associate with it. Add a list of cost centers to the group on the lower browse.
Associate the cost center group with selected user IDs, under System Administration|Users|Cost Center Group. You can associate multiple cost center groups with a user ID.
When the user selects the Authorize action in Requisitions, the system validates the associated account group or cost center group in the requisition with the user permissions. If the system finds proper user permissions, the requisition approval process begins.
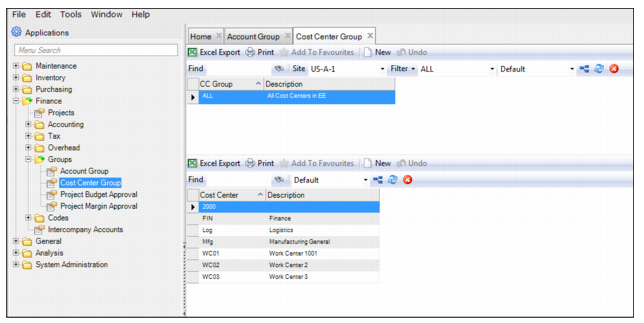
Cost Center Group Browse
Access this browse from Finance|Groups|Cost Center Group. Use it to organize and display records, to access supporting functions, and to edit or create new records.
Cost Center Group Browse
Cost Center Group Right-Click Menu
The right-click menu contains administrative functions and options from the Action menu.
Cost Center Group Right-Click Menu
New
Use New to open the cost center group record detail to create a record.
Edit
Use Edit to open the cost center group record detail to edit the selected record.
Columns
A list of columns available to the browse displays here. Select a column header to display it. Clear the column header to hide it.
Creating a New Cost Center Group
1 Click New in the upper browse.
2 Enter the cost center group name and description.
3 Click New in the lower browse.
4 Select a cost center from the lookup. Add as many cost centers as you need.
Editing a Cost Center Group
1 Double-click a record from the browse or click Edit to open the cost center group record detail.
2 Enter the cost center group name or description.
3 Click New or Delete in the lower browse to add or remove cost centers from the group.
Project Budget Approval Group
Use Project Budget Approval Groups to represent a group of users who can approve projects.
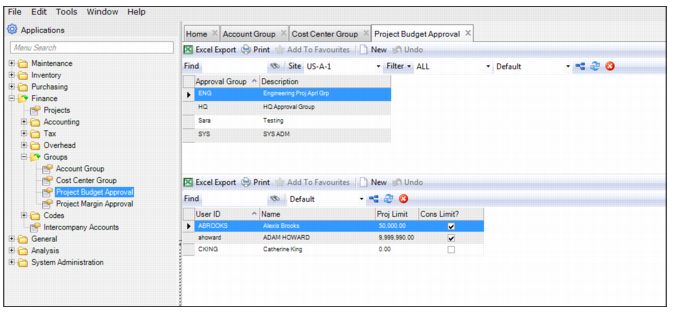
Project Budget Approval Group Browse
Access this browse from Finance|Groups|Project Budget Approval. Use it to organize and display records, to access supporting functions, and to edit or create new records. Assign a project approval group to a project.
When a user approves a project, EAM validates the user’s spending limit. If the spending limit is equal to or greater than the project cost, the project is approved and authorized. If the project cost exceeds the spending limits, then the action is approved but not authorized. Someone with sufficient spending limits must authorize it.
The settings for a user under System Admin|Users|Detail tab determine user spending limits and amounts for approval of projects.
Project Budget Approval Group Browse
Project Approval Group Right-Click Menu
The right-click menu contains administrative functions and options from the Action menu.
Project Approval Group Right-Click Menu
New
Use New to open the project approval group record detail to create a record.
Edit
Use Edit to open the project approval group record detail to edit the selected record.
Columns
A list of columns available to the browse displays here. Select a column header to display it. Clear the column header to hide it.
Creating a New Project Approval Group
1 Click New in the upper browse.
2 Enter an approval group and description.
3 Click New in the lower browse.
4 Select a user from the lookup. Add as many users as you need.
Editing a Project Approval Group
1 Double-click a record from the browse to update the project approval group description.
2 Enter or edit an approval group description.
3 Click New or Delete in the lower browse to add or remove users from the group.
Project Margin Approval Group
Use Project Margin Approval Groups to represent a group of users who can approve customer-funded projects when margin approval is used.
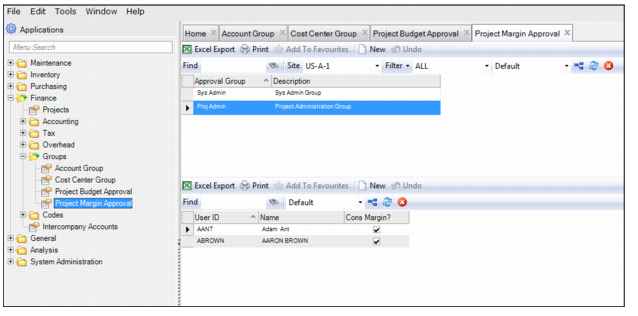
Project Margin Approval Group Browse
Access this browse from Finance|Groups|Project Margin Approval. Use it to organize and display records, to access supporting functions, and to edit or create new records. Assign a project margin approval group to a project.
Project Margin Approval Group Browse
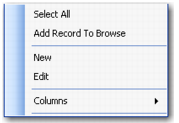
Project Margin Approval Group Right-Click Menu
The right-click menu contains administrative functions and options from the Action menu.
Project Approval Group Right-Click Menu
New
Use New to open the project margin approval group record detail to create a record.
Edit
Use Edit to open the project margin approval group record detail to edit the selected record.
Columns
A list of columns available to the browse displays here. Select a column header to display it. Clear the column header to hide it.
Creating a New Project Margin Approval Group
1 Click New in the upper browse.
2 Enter a margin approval group and description.
3 Click New in the lower browse.
4 Select a user from the lookup. Add as many users as you need. You can only add users that have the Margin Approver? check box selected in the System Administration|Users|Detail tab. The Margin Approver? setting indicates if a user can be added to a project margin approval group. See
Users.
Editing a Project Approval Group
1 Double-click a record from the browse to update the project approval group description.
2 Enter or edit an approval group description.
3 Click New or Delete in the lower browse to add or remove users from the group.