QAD Enterprise Asset Management 2017.1
>
User Guide
>
Projects
>
Projects
Projects
Creating a Project
Follow these steps to create a project:
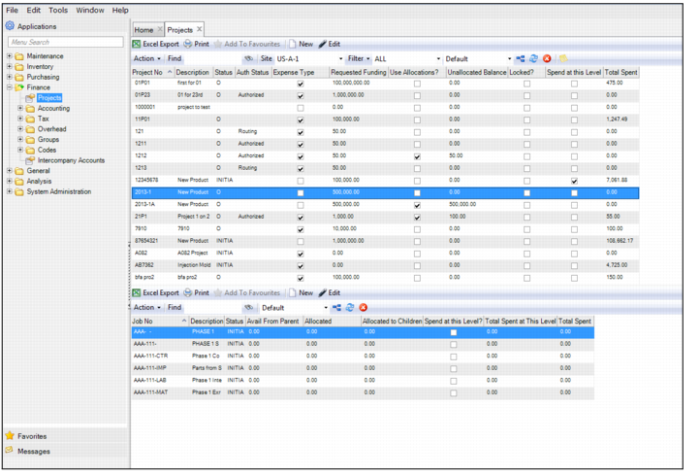
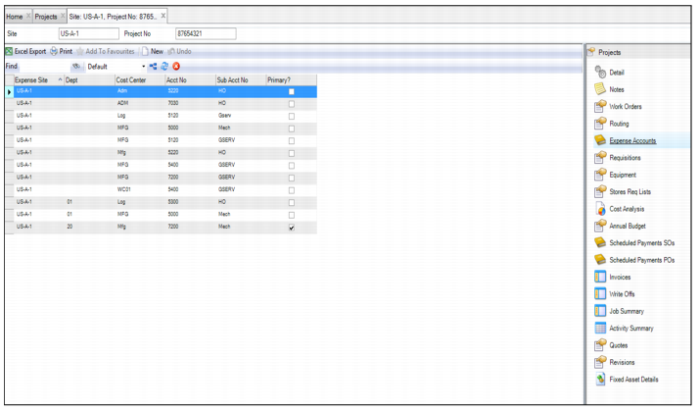
1 Open the Projects browse in Finance|Projects.
Projects Browse
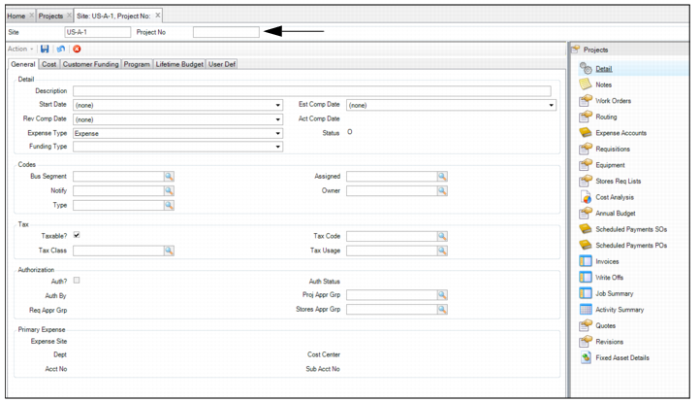
2 Click New. A blank project record opens. In the Project No field, enter a unique project number or name.
Project Record
3 Enter information in relevant fields on the General, Cost, Customer Funding, Program, Lifetime Budget, and User Defined tabs. See
Filling Out a Project Record.
4 Once all the information has been entered, click Save.
Filling Out a Project Record
Enter information about the project in the General, Cost, Customer Funding, Program, Lifetime Budget, and User Defined tabs.
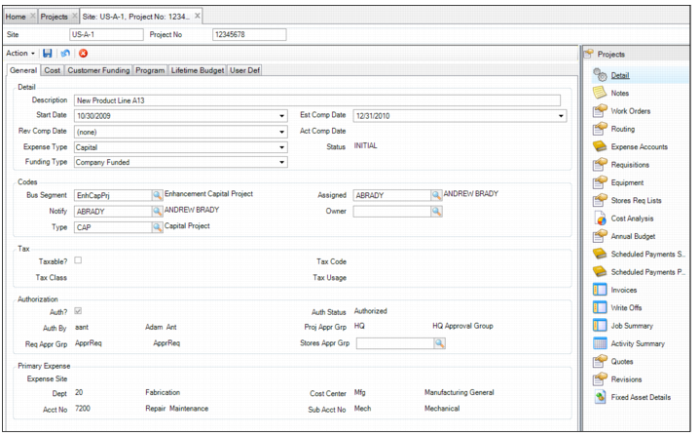
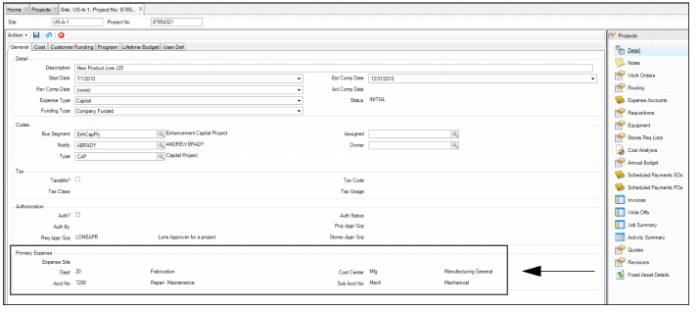
Project: General Tab
Use this tab to define, view, or change information about the project, including details, codes, tax, authorization, and primary expense accounting.
Project: General Tab
Detail
Description
Enter an alphanumeric description of the project.
Start Date
Enter the planned start date of the project. The project manager uses this data for planning and reference purposes.
Estimated Completion Date
Enter the estimated completion date of the project. Use this data for planning and reference purposes. After you complete and close the project, compare this date to the revised and actual completion date to measure success in planning and scheduling.
Revised Completion Date
Enter a revised completion date from the estimated completion date.
Note: Use this date in reporting, to compare the estimated completion date with the actual completion date.
Actual Completion Date
This system-assigned date indicates when the project was completed. Compare the actual completion date to the estimated completion date. Review the completed date to measure success in planning and scheduling.
Note: If you reopen a closed project, the system clears the actual completed date field.
Expense Type
Select the expense type, Capital or Expense.
All projects default to Expense. If there is requisition authorization, Expense Type specifies the approval process for a project requisition. In User Maintenance, each user has a spending limit for two types of requisitions: expense or capital. The requisition type determines the kind of limit the individual has.
Status
The user-defined project status. Initial project status defaults from the Default? check box from Finance|Codes|Projects|Status. Project status cannot be closed or canceled for a work order, stores requisition, or purchase order to reference that project. To receive and issue parts or distribute labor against a project number, the project status cannot be closed or canceled, and must be approved, if authorization of projects is required under General|Business Units|Sites|Maintenance tab|Proj Auth?.
If the e-mail check box is selected on Finance|Codes|Projects|Statuses, the system e-mails users designated to notify of the change.
Funding Type
Select the following funding types from the drop-down list:
• Company Funded. The company receives an order to make a certain part and the company funds the entire project and negotiates the payment terms.
• Customer Funded. The company receives a customer purchase order and places a sales order for the customer, who is invoiced for the project deliverable.
• Both. The project is funded partly from customer and by company.
• Internal. The project has no external deliverable and is usually expensed.
Codes
Business Segment
Business Segment can represent a plant or group of plants. With customer-funded projects, the business segment may be a client. You may have specialized business segments that operate as units distinct from the financial accounting structure of departments or cost centers. These concentrate on particular tasks. Assign a business segment to a project to track which ones initiate particular capital projects.
Assigned
The employee assigned to this project. The assigned employee and the user or group to notify are often the same person.
Notify
Enter a user or mail group to receive e-mail notifications about spending limit warnings and changes in status of the project. This user receives e-mail notifications about changes in the status of the project and any spending limit warnings. Typically, the Notify individual is the same person as the Assigned. All individual or group users in this field are notified through e-mail when a project is authorized and open to spending.
Owner
The user ID or owner group that owns this project. The owner field adds security to each project record. If the owner field is blank for a given project record, any user with security to update projects can update this project. If the owner is a single user, then only that user can update that project. If the owner is an owner group, then any member of that group can update the project. Owner groups are set up in General|Groups|Owner Group.
Type
Use the lookup and select a project type to classify the project. Set up user-defined project codes in Finance|Codes|Project|Project Types.
Tax
Taxable?
Select this check box for a taxable project. The Taxable check box overrides all other tax settings for all project purchases.
Tax Code
A project’s tax code. Assign a project tax code if a project is tax exempt or has a reduced tax rate. All purchases for a project inherit the project tax code, instead of the one from the vendor, inventory, or ship-to record.
Tax Class
The system copies the default tax class to the project.
Tax Usage
The system copies the default tax usage to the project.
Authorization
Authorized?
The system indicates whether the project has been authorized, if the project required authorization.
Authorization Status
The authorization status of the project.
The status remains blank if the authorization has not been started. If the project is in the routing process, the status is routing. If it is authorized, the status is authorized.
Project Approval Group
A code identifying a group of users who make up a project approval group. If projects require authorization, select a project budget approval group to designate who receives the request for authorization. The system routes the authorization request to that group. The project approval group receives e-mail about the request and can approve or disapprove the project.
Note: This field is required to submit authorization routing for a project.
Note: When margin approval is in use, the lookup provides a selection of project margin approval groups defined for the project site
Authorized By
The user who was the final project approver.
Requisition Approval Group
This code identifies the requisition approval group for this project. Users in this group receive e-mail requests for authorization of all requisitions associated with this project.
If you select the Requisition Project Limit check box, which is on the Authorization tab on the Site record, EAM uses the Req Project Limit value.
Stores Approval Group
When the site setting for Stores Auth? is set to Project or All, the system enables this field for a project. You cannot issue parts to a stores requisition list that references the project unless the stores requisition is authorized.
Use the lookup to select the stores requisition approval group for this project. This field designates which approval group to use when authorizing a stores requisition list that references a project.
Note: Unlike most fields in Project Maintenance, copying a project does not copy the stores requisition approval group.
Note: If project revision control is active, changing the stores requisition approval group field creates a revision record for the project.
Primary Expense
Expense Site
The site with the costing structure from the project expense accounts subdetail. The primary expense accounting is set up in the Expense Accounts submenu for the project.
Dept
The primary department associated with the project.
Cost Center
The primary project cost center from the project expense accounts subdetail. The primary cost center copies to various transactions, such as purchasing, labor, and parts issued for this project.
Acct No
The primary expense account from the project expense account subdetail.
Sub Acct No
The primary expense sub-account from the project expense account subdetail.
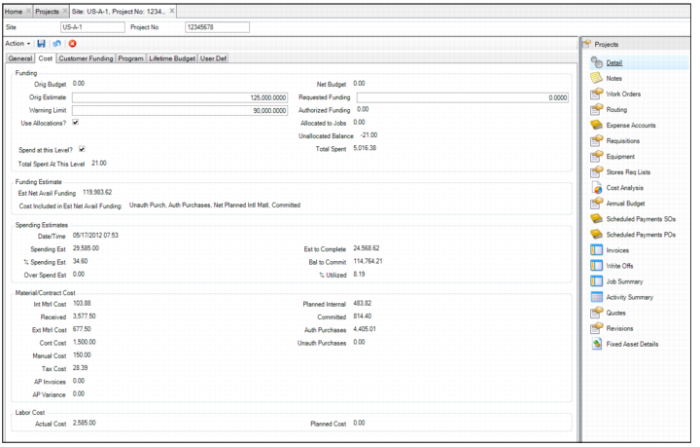
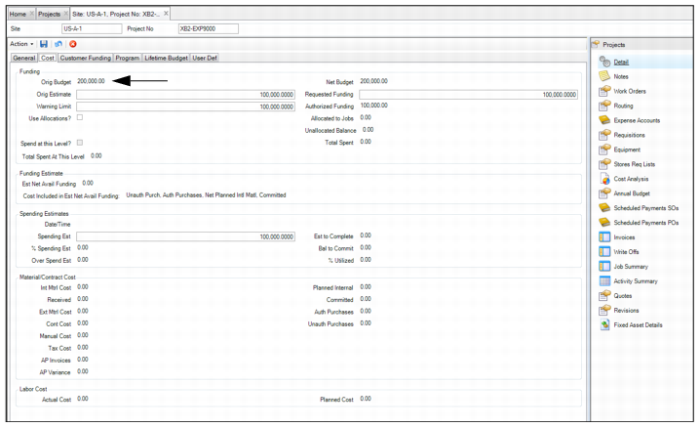
Project: Cost Tab
Use this tab to request funding and view costs charged for the project.
Project: Cost Tab
Funding
Original Budget
The value entered in Modify Budget action. This value records the original or updated project budget.
Net Budget
This amount includes the original budget plus or minus any reallocations.
Original Estimate
The original cost estimate for the whole project. This number is an estimate to reference as the project progresses. At the close of the project, it helps project managers to detect discrepancies in estimates against the actual amount. Managers use the information to better estimate future projects and to investigate reasons for estimate discrepancies.
Requested Funding
Funding that is requested for a project. Cost cannot be charged against a project until funding is requested and any approvals are made, if necessary.
If Project Authorization is disabled, the amount entered into the Requested Funding field automatically populates the Authorized Funding field. If Project Authorization is required, the funding amount appears in the Authorized Funding field once electronically approved through EAM.
Additional funding for a project can be requested by increasing the amount in the Requested Funding field to the new required funding level. As with the initial funding, the new funding amount populates the Authorized Funding field based on the project authorization setting.
Authorized Funding
EAM only considers the amount in the Authorized Funding field when considering spending limits for a project.
Authorized Funding is automatically populated based on the Requested Funding amount, depending on the Project Authorization site setting. If Project Authorization is disabled, the amount entered into the Requested Funding field automatically populates the Authorized Funding field. If Project Authorization is required, this amount appears in the Authorized Funding field once approved.
Warning Limit
An amount the project manager sets as a budgetary warning point. The system issues an e-mail warning to the Notify user or group when expenses reach this amount.
Total Spent
The amount spent to date on the project. This amount includes parts issued, services, and labor transactions.
Note: The amount in this field equals the sum of all costs for project and rolled-up costs from jobs associated with the project.
Use allocations?
Select this check box to enable control of funding using allocation for projects and jobs.
Allocated to Jobs
Project funding amount allocated to jobs within the project.
Unallocated
Amount of project funding not yet allocated from the project to the jobs.
Spend at this Level?
Select this check box to allow spending at the project level. If this check box is not selected, the cost must be directed to a job and cannot be directed to the project only.
Total Spent at this Level
The amount spent to date at the project level. This amount does not include the rolled-up expenses from jobs.
Funding Estimate
Estimated Net Available Funding displays an estimated amount of remaining funding after considering a broader range of expected expenditures in addition to actual costs already incurred.
This amount could include the following:
• Committed. Ordered purchase orders that represent committed expenditures to suppliers.
• Authorized Purchases. Purchase orders that are authorized but not yet placed on order.
• Unauthorized Purchases. Purchase orders that are planned but not yet authorized.
• Planned Internal. Material from stores lists that has not yet been issued or expensed to the project.
• Planned Labor. Estimated labor expense on WO.
The cost categories are selected in General|BusinessUnits|Site|Maintenance tab for Est Net Avail Funding Options. The categories can include any or all of the following: Auth Purch, Unauth Purch, Committed, Planned Labor, and Planned Internal Material.
Estimated Net Available Funding
The net amount of funding available for the project calculated by subtracting the costs indicated in the Costs Included in Estimated Net Available Funding field and Total Spent from the Auth Funding amount.
Costs Included in Estimated Net Available Funding
The cost categories selected for the project site are listed.
Spending Estimates
Date/Time.
System-updated on each Project Refresh action. Provides a visual reminder to keep this cost page current with Refresh.
Spending Est
Enter the estimated amount to spend on the project.
% Spending Est
How close expenditures are to the total estimated spending for the project, as a percentage. This value is calculated by dividing the Site’s Calc % Spend Est options amounts by estimated spending. The options amounts are found on General|Business Units|Site|Maintenance tab and include Unauth Purch, Auth Purch, and Committed.
Note: The system recalculates the value of this field when the following job functions or actions occur:
• Changing the spending estimate of a job
• Canceling a job
• Deleting a job
• Reopening a job
If revision control is active, recalculating field values also creates revisions.
Over Spend Est
Expenditures over the total estimated spending for the project, as a percentage.
Note: The system recalculates the value of this field when the following job functions or actions occur:
• Changing the spending estimate of a job
• Canceling a job
• Deleting a job
• Reopening a job
If revision control is active, recalculating field values also creates a revision. This figure notifies managers when the project expenditures exceed estimated spending.
Est to Complete
The system calculates this value as spending estimate minus total spent. It is updated when the spending estimate changes or when you refresh the project.
Note: The system recalculates the value of this field when the following job functions or actions occur:
• Changing the spending estimate of a job
• Canceling a job
• Deleting a job
• Reopening a job
If revision control is active, recalculating field values also creates revisions.
Balance to Commit
The total of uncommitted authorized funds. Calculated as Authorized Funding – (Auth Purch + Committed + Total Spent).
% Utilized
Calculated as (Auth Purch + Committed + Total Spent)/Authorized Funding.
Materials/Contract Costs
Int Mtrl Cost
The sum of all direct issues from inventory, not through a requisition, for the project.
Received
The system calculates the total sum of all received purchases associated with the project.
Ext Mtrl Cost
The project parts total, minus tax, for auto-issue receipt transactions only.
Contractor Cost
The project’s total for outside contractor services, minus tax. This value represents receipt transactions for all auto-issue requisitions marked as Contractor.
Manual Cost
The sum of all manual GL transactions for the project.
Tax Cost
Tax associated with any costs from external material and contractor services.
AP Invoices
The supplier invoices total for the project’s POs.
AP Variance
The difference between supplier invoice cost and PO cost.
Planned Internal
The total planned cost of material issues from inventory.
Committed
The total value of ordered purchase orders minus any receipts against the purchase orders.
Auth Purchase
The total cost of all planned, authorized requisitions that reference the project.
Unauth Purchase
The total cost of all planned, unauthorized purchase requisitions for the project.
Labor Cost
Actual Cost
The labor transactions total charged to the project.
Planned Cost
The planned labor for work orders for the project.
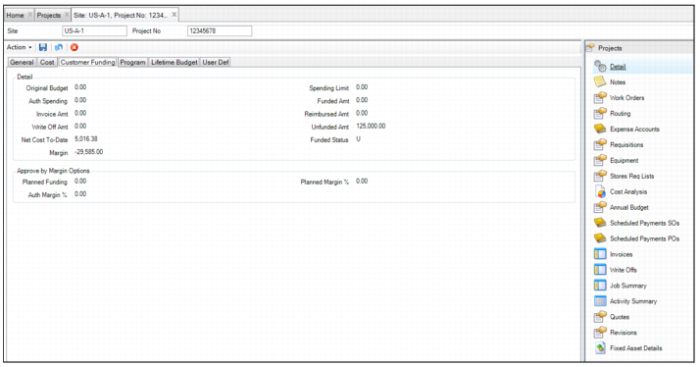
Project: Customer Funding Tab
Use the Project Customer Funding tab to track information against customer-funded projects in EAM.
Project: Customer Funding Tab
Detail
Original Budget
The original budget estimate from the Cost tab, or updated with the Modify Budget action.
Spending Limit
Data from the Requested Funding field on the Cost tab.
Auth Spending
The current amount authorized on this project from the Cost tab.
Funded Amount
The SO line amount totals from Scheduled Payments SOs on the submenu.
Invoice Amount
The amount invoiced to the customer from QAD ERP based on the invoice created from the scheduled SO payments. EAM calculates this amount by totaling all invoiced amounts from the Invoice submenu.
Reimburse Amount
The amount received as customer payments against invoices for reimbursement downloaded from QAD ERP.
Write Off Amount
The total of write-offs entered in the Write Off submenu.
Unfunded Amount
The authorized amount minus (Funded Amt + Write-off amounts).
Net Cost-to-Date
EAM subtracts the reimbursement amount from the Total Spent amount on the Cost tab.
Funded Status
EAM displays funded, unfunded, or partial. If Funded Amt has a value of 0, the status displays as Unfunded. If the field Unfunded Amt has a value of 0, and the Funded Amt contains a value, the status displays as Funded. If there is a value in both the Funded Amt and the Unfunded Amt fields, the status displays as Partial.
Margin
EAM subtracts Requested Funding from the total Funded amount to calculate this field.
Approve by Margin Options
These fields are used when the project is authorized using Margin Approval. See
Creating a Project.
Note: These fields are only enabled when the Approve by Margin? check box is selected for the Project site. See
Sites: Maintenance Tab.
Planned Funding
Enter planned funding amount to represent the selling price to the customer.
Planned Margin %
This percentage is calculated as follows:
Planned Margin % = [(Planned Customer Funding / Authorized Funding) -1] x 100.
Note: The Authorized Funding figure is from the Cost tab.
Auth Margin %
The system updates this percentage to equal the Planned Margin% once the project has been authorized.
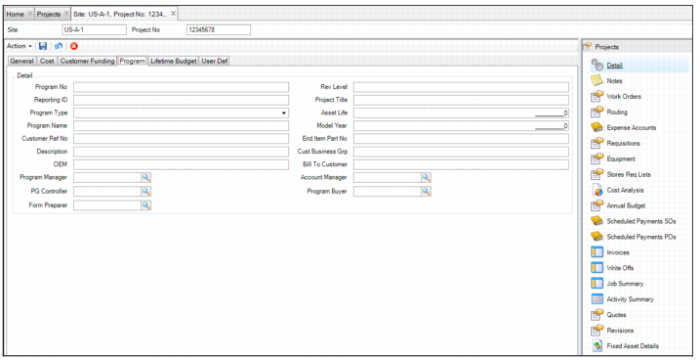
Project: Program Tab
Use the Project Program tab to track information against project programs in EAM.
Project: Program Tab
Program No
Enter the project program number.
Rev Level
Enter the revision level.
Reporting ID
Use this ID to filter groups of projects.
Project Title
Enter the project title. For example, it can be a combination of the OEM, program name, model year, part name, and end item number for customer-funded projects.
Program Type
Select Forward or Current model from the list.
Asset Life
Enter the remaining life of the program.
Program Name
Enter the customer program name.
Model Year
Enter the model year for the customer program.
Customer Ref Number
Enter the customer reference number.
End Item Part No
If this is a customer-funded project, enter the original equipment manufacturer’s (OEM) end item part number from the PO.
Description
Enter the program description.
Cust Business Group
Enter the customer business group with which to work on this program.
OEM
Enter the original equipment manufacturer.
Bill To Customer
Enter the name of the customer, normally the customer issuing the PO, to whom to bill the project costs.
Program Manager
Select the program manager from the list of EAM user IDs.
Account Manager
Select the account manager from the list of EAM user IDs.
PG Controller
Select the program controller from the list of EAM user IDs.
Program Buyer
Select the program buyer from the list of EAM user IDs.
Form Preparer
Select the form preparer from the list of EAM user IDs.
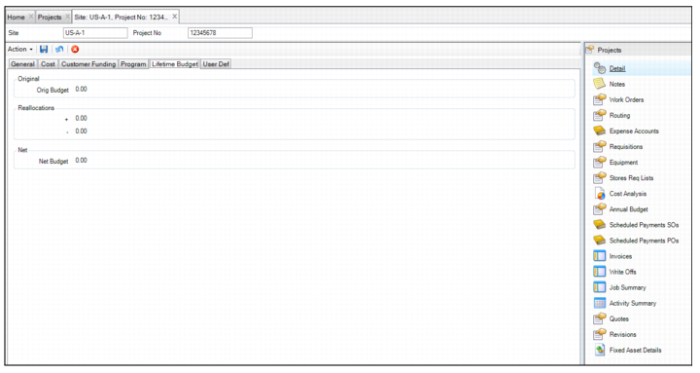
Project: Lifetime Budget Tab
Use the Project Lifetime Budget tab to track information against its lifetime budget in EAM.
Project: Lifetime Budget Tab
Orig Budget
The original budget estimate from the Cost tab or updated using the Modify Budget Action.
Reallocations
The plus (+) value includes additions to the project budget from other projects through reallocation. The value is added to the Orig Budget to calculate the Net Budget. The minus (-) value includes subtractions from the project budget to other projects through reallocation. EAM subtracts reallocated amounts from Orig Budget to calculate Net Budget.
Net Budget
EAM displays the original budget recalculated against reallocations.
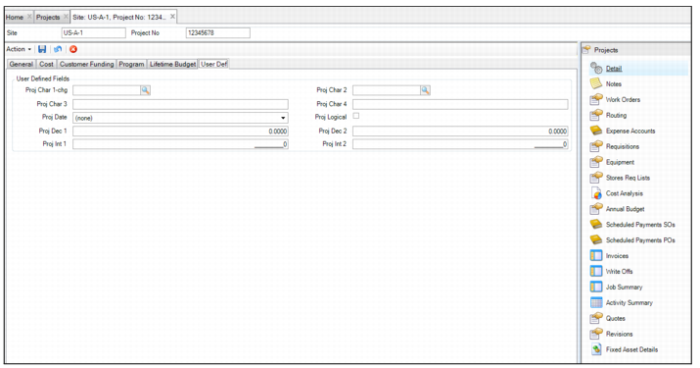
Project: User-Defined Tab
Use the Project User-Defined tab to track information against specific projects in EAM. There are ten user-defined fields.
Project: User-Defined Tab
Character 1/2
User-defined character fields, validated against tables that you add.
Character 3/4
Free-form user-defined character fields, not validated against tables.
Decimal 1/2
User-defined decimal fields for projects.
Date.
A user-defined date field.
Integer 1/2
User-defined integer fields for projects.
Logical
A user-defined check box.
Project Notes
If necessary, you can add notes to the project record. To add notes, open the project record and select the Notes submenu.
Note: The Notes submenu includes notes in a free-form text box that are for internal use only and are not printed on any documents.
Defining a Primary Expense Account for a Project
In the Expense Accounts submenu, you can define, edit, and view expense accounts associated with the project. To spend against a project, you must define at least one expense account. If you define one expense account, that expense account defaults as the primary site and expense account. The details of the primary expense account default into the General tab for the project. EAM allows you to define multiple expense accounts, which are available for assignment in Purchasing and Work Orders for the project and its jobs.
Follow these steps to define an expense account for a project:
1 Open the project and select the Expense Account submenu.
2 Click New. Enter the information about the expense account in the following fields:
Expense Site
Defaults to the project’s expense site. If necessary, use the lookup to select a different site.
Department, Cost Center, Account Number, and Sub-Account Number
Use the lookups in these fields to select the department, cost center, account number, and sub-account numbers to which the expenses are charged.
Primary?
Select this check box if this expense account is the primary expense account for this project. Only one expense account can be designated as primary.
3 Once the information has been entered in the fields, press Enter to save.
4 If necessary, define additional expense accounts by repeating these steps.
Project Notes Submenu
Note: The expense account information is displayed on the General tab.
Expense Account Information
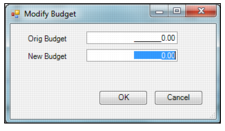
Defining the Project Budget
Follow these steps to define the project budget:
1 Open the Projects browse and highlight the project.
2 Select Modify Budget from the Project Action menu. The Modify Budget window opens.
3 Enter the project budget in the New Budget field and then press OK.
Modify Budget
The project budget is displayed in the Original Budget field in the project record.
Project Budget in Original Budget Field
Attaching and Linking Files to a Project
EAM allows you to attach and link an unlimited number of files and link an unlimited number of URLs to a project record. If you can run the file on your operating system, you can run it from EAM once it is attached or linked.
Attach or Link an External File to a Project
Attach a File
To attach a file to a project:
1 Select the project from the Projects browse.
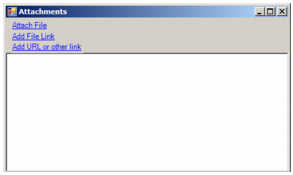
2 Select Attachments from the Action menu.
3 In the Attachments window, select Attach File.
4 Locate the file on your computer and click Open. The file is now attached to the project.
Link a File
To link a file to a project:
1 Select the project from the Projects browse.
2 Select Attachments from the Action menu.
3 In the Attachments window, select Add File Link.
4 Locate the file on your computer and click Open. The file is now linked to the project.
Link a URL
To link a URL to a project:
1 Select the project from the Projects browse.
2 Select Attachments from the Action menu.
3 In the Attachments window, select Add URL or other Link.
4 Copy and paste the link into the field and then click OK. The URL is now linked to the project.
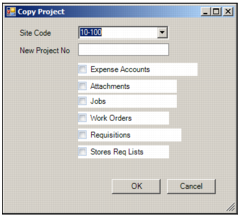
Copying a Project
The Copy Project action allows you to copy the expense data, attachments, jobs, work orders, requisitions, and stores requisitions lists from one project and use it as a template for a new project.
Follow these steps to copy a project:
1 Open the Projects browse and highlight the project that you want to copy.
2 Select Copy Project from the Projects Action menu. The Copy Project window opens.
3 The Copy Project window contains the following fields for setting up the new project:
Site Code
If necessary, use the drop-down list and select a new site code.
New Project Number
Enter the project number in this field.
Expense Accounts, Attachments, Jobs, Work Orders, Requisitions, and Stores Requisition Lists
Select these check boxes to copy that item to the new project. If an item is not selected, that item is not copied to the project.
Copy Project
4 Click OK to create the project.