Views
There are a number of components of the workbenches that can be customized and saved as part of a view:
• Item maximum view: Item data is made as large as possible to focus on just the item information.
• Optimized view: Sequence Grid and Capacity Panel are opened and optimized as the focus is on data in just the two areas for the current scheduler.
• Full view: The entire Sequence Grid displays along with data in a supporting program for any selected item.
• Side-by-side view: MSW and PSW are open to display both schedule types side by side.
Create Views: Example
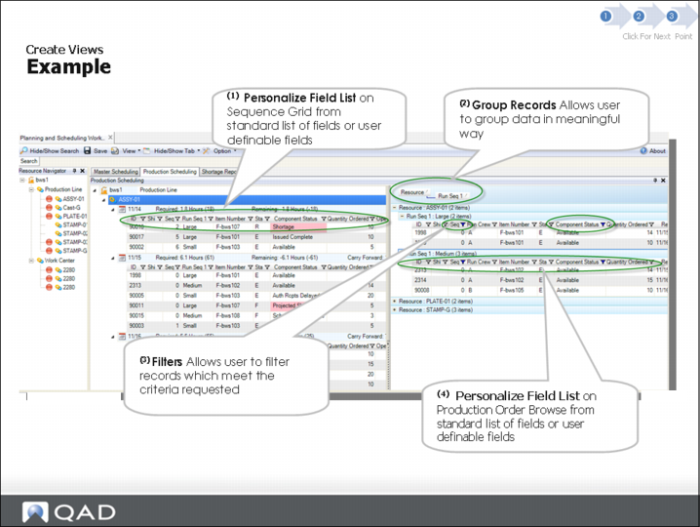
You can easily create your own view by:
Personalizing the field list: You can add fields or user-definable fields.
Group records: Group records by Scheduler ID to easily view only those item records you are scheduling.
Filters: You can filter records to meet you specific criteria.
Personalize Field List: Add fields or remove them in Production Order Browse so that you narrow down and focus in on only data of interest to you.
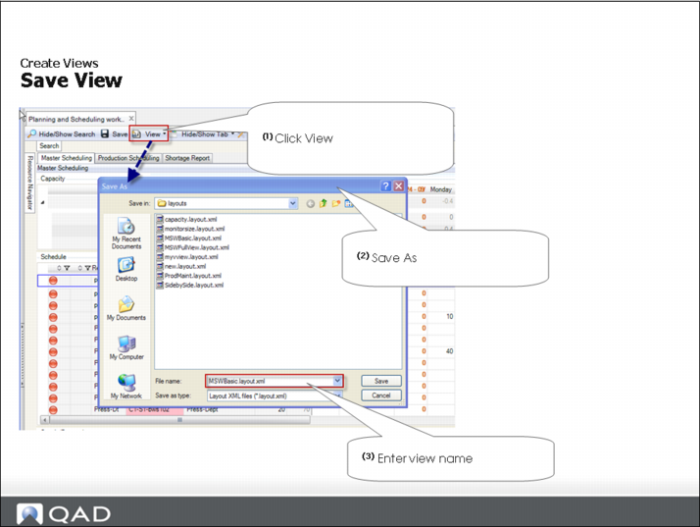
Save Your View
From the Views pull-down menu, select Save or Save As to save the view. If you select Save As, name your view, then save the view.
Dual-Monitor View
Dual-Monitor View
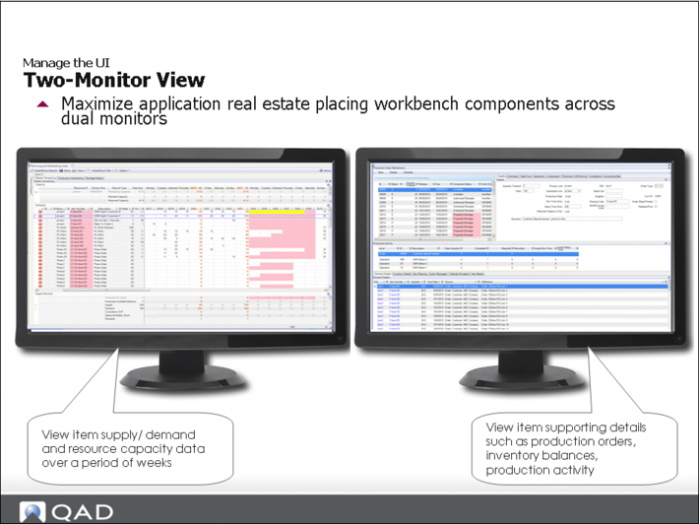
Maximize application real estate placing workbench components across dual monitors.
View item supporting details such as production orders, inventory balances, production activity.
View item supply/ demand and resource capacity data over a period of weeks.
Note: If you start two separate session of the Planning and Scheduling Workbenches, data you manipulate in the one MSW session does not display in a separate session of the PSW, and vice versa.
Other Topics
Hands-On Lesson Section
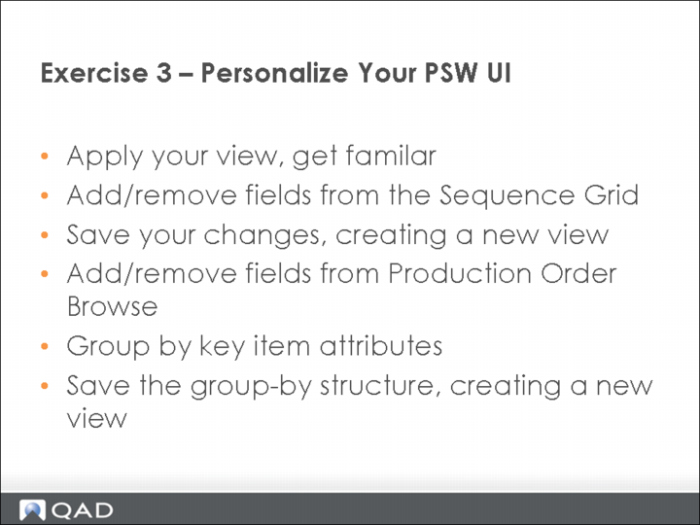
Exercise 3: Personalize Your PSW UI
Apply Your View - Get Familiar
1 Begin by entering selection criteria Site equals 10-202.
2 Enter Scheduler ID equals Group1.
3 In the Navigator Panel, click on ASSY-01.
4 On Toolbar, click View, then select your saved view from prior MSW lesson.
Note: If you have no views created, then create a view now with the Save As command.
Add/Remove Fields on the Sequence Grid
The system default fields on the Sequence Grid are not sufficient for the data filtering and sorting required in your environment, so you add/remove fields from the Sequence Grid in this exercise.
1 In the Sequence Grid, right-click and select Columns, then de-select/remove the Run-Seq2 field.
Run Seq 2 field is removed from Sequence Grid.
2 In the Sequence Grid, right-click and select Columns, then de-select/remove the Run Crew field.
The Run Crew field is removed from Sequence Grid.
3 In the Sequence Grid, right-click and select Columns, then select/add the Tool field.
The Tool field is added to Sequence Grid.
4 In the Sequence Grid, select the Tool column, then hold down the left mouse button and drag the column to the right of the Due Date column.
• Question: Did the changes you applied to the Sequence Grid apply to the Production Order Browse too?
Save Your Changes, Creating a View
1 On Toolbar, select View, then Save.
Your changes have been saved to your existing view.
Add/Remove Fields from the Production Order Browse
The system default fields on the Production Order Browse are not sufficient for the data filtering and sorting required in your environment. You decide to add/remove on the Production Order Browse.
For this exercise, you should perform all the same steps in step 1 and 2 of
Apply Your View - Get Familiar.
Important: Once you do, click View, then Save.
Your changes have been saved to your existing view.
Group by Key Item Attributes
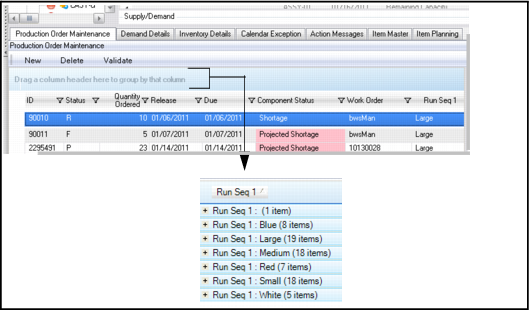
You wish to view the data on the Production Order Browse, grouped by your key item attributes. You do this by grouping by the Run Seq1 column.
1 In the Production Order Browse Run Seq1 column, drag the column to the
Drag a column here to group by that column target; see
Production Order Browse Results.
The Production Order Browse displays data grouped by Run Seq1. You should have similar results to the following:
Production Order Browse Results
Save the Group-By Structure as Part of your View
Since this is your primary method of viewing data on the Production Order Browse frame, you save the group-by structure from prior step as part of your view.
1 On Toolbar, click View.
2 Important: Save your changes.
Your changes have been saved to your existing view.
3 On Search Panel, run Search.
The changes you made to your view should remain in place.
Note: If you did not save your changes to your View, after running a search, any UI changes you made are lost.
Questions
1 True or False. If you want more or different fields to display in the pull-down your IT department can customize the list through the QAD Enterprise Application (EA) Browse Maintenance in .NET UI.
2 True or False. The default columns are identical on both the Sequence Grid and Production Order Browse.
3 True or False. Production Order Browse columns are taken from QAD EA Production Order Browse and therefore, are not user definable.
4 Which of the following views are available in the PSW.
• Item maximum view
• Optimized view
• Full view:
• Side-by-side view
5 Name at least two ways to personalize your view.
Answers
1 True. The IT department customizes the list of fields that you can add.
2 True. The default columns are identical.
3 False. The columns are user definable.
4 All of them are available.
5 You can easily create your own view by:
• Personalizing the field list: You can add fields or user-definable fields.
• Group records: Group records by Scheduler ID to easily view only those item records you are scheduling.
• Filters: You can filter records to meet you specific criteria.
• Personalize Field List: Add fields or remove them in Production Order Browse so that you narrow down and focus in on only data of interest to you.