Defining Role Permissions
Use Role Permissions Maintain (36.3.6.5) to define the role permissions in your system. You define permissions for both resources on the menu and resources that are not on the menu.
For resources on the menu, note the following:
• Only executables can be secured, not folders. The folder represents a container to help logically organize functions, but no security is associated directly with it. If a user does not have access to any executable programs in a folder, that folder does not display on the menu.
• If an executable appears more than once in the menu tree, the same security always applies to it.
Example: For user convenience, Maser Comment Maintenance (gpcmmts.p) appears on the menu as 1.12, 2.1.12, 2.3.12, 2.5.12, and 14.12. You cannot give a role access to menu 1.12 and not give them access to menu 2.1.12. The access is associated with gpcmmts.p, not the menu position. The menu numbers are used only to make it easier to logically group programs.
• Regardless of how a menu resource is accessed, the same security applies. For example, related functions can be accessed from a Go To menu only when the current user has access to the destination function. This is also true of the related views and reports; users must have access to the menu-level program to be able to run it from within another function.
Note: When using an API to access the application, you must provide a login that has permissions for the activity you want to perform.
• When a new item is added manually in Menu System Maintenance (36.4.4.1), it is initially inaccessible to all users, and consequently, will not be seen on the menu. You must assign the menu to a role before members of that role can see or use the menu.
Important: You should keep this in mind when customizing the menus; if you simply add the item to the menus and check to see if it appears, you will not be able to see it. You must add it to a role and be logged in as a user with that role to see the new menu.
• Menus are cached in memory during login; you must log out and log in again to see any menu changes. Changes to role permissions do not affect any users currently logged in. Changes take effect the next time they log in. This approach avoids performance degradation from continually checking for security changes.
Note: Lookups that let you select a record are not separately secured. Access to a function implies access to all lookups used in the function. When a lookup contains links to drill-down browses, these are only secured if they are on the menu. If a power-browse is not secured by being put on the menu, any one can execute it.
Role-based permission prevents any executable from being run from within your QAD application unless it is added to the menu and then added to a role. You cannot directly invoke a Progress program that is not on the menu by typing its name at the menu prompt in the character user interface.
When users attempt to execute a program on the menu and their current role does not grant access, the message “Program not found” displays.
Important: To access the program and field help in the .NET UI, a user must have access to Field Help Maintenance (36.4.13). If a user is unable to access the help, a possible cause of the problem is that the user does not have access to Field Help Maintenance (36.4.13).
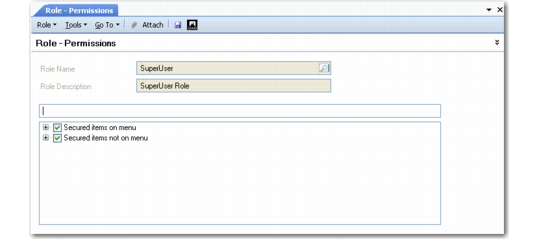
Role Permissions Maintain (36.3.6.5) illustrates Role Permissions Maintain. At the top-most level, you can define secured items on the menu and secured items not on the menu. Both top-level selections display application resources defined in the system using a tree model with leaf and non-leaf nodes, similar to how the menu itself displays.
Role Permissions Maintain (36.3.6.5)
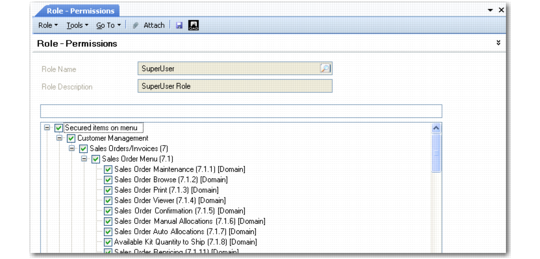
Secured Items on Menu
Each menu item displays identified by menu number and arranged according to the system menu. Any selected items represent the menu items currently assigned to the specified role. Each menu item corresponds to a record in the mnd_det table.
To assign a menu item to a role, open the relevant menu grouping, navigate to the menu item you want to associate with the selected role, and click in the check box next to the item.
Role Permissions Maintain, Secured Items on Menu
The tree nodes can be expanded and contracted. Nodes can have one of three possible states:
• Clear. No selection is in effect.
• Shaded. One or more but not all of the leaf nodes or non-leaf nodes lower in the tree are selected.
• Selected. The top-level node and all lower level nodes are selected.
Selecting a node within a node causes the node higher up to display as shaded. Selecting a node causes all items below it to be selected and is indicated in the higher node. The ability to select a node and cause lower nodes to also be selected streamlines the process of setting permissions.
Since menu items on submenus inherit associations created at a higher level, you can associate a menu group high in the menu tree, clear any unwanted associations for submenus, and then modify selections at the menu item level, if required. This makes the process of administering role permissions easier.
Menu items in the tree display with [Domain] or [Entity] after the menu description. This indicates the level at which security access is checked when this function is executed. Most operational functions are secured at the domain level and most financial functions are secured at the entity level.
• When [Domain] displays, the function can be executed when the user has access to at least one entity within the domain.
• When [Entity] displays, the function can be executed only when the user has access for the specific entity.
Note: Do not confuse this with the level of the data being updated by the function. For example, Tax Type Maintenance (29.1.1) is secured at the domain level, even though tax types can be used system wide.
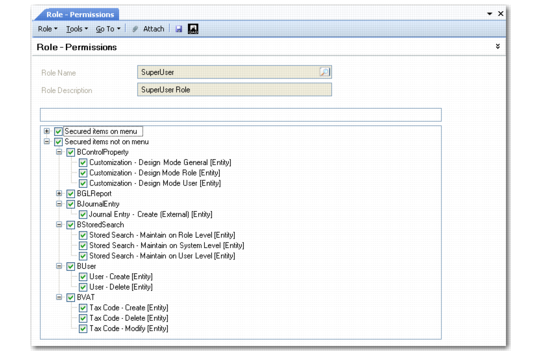
Secured Items Not on Menu
Activities that can be secured even though they are not on the menu are displayed based on the component name and the activities associated with the component. Selected items are currently assigned to the specified role.
You assign items to a role in the same way you assign menu items, by clicking in the check box next to the item.
Role Permissions Maintain, Secured Items Not on Menu
Secured Items Not on Menu lists these functions and explains their use.
If you plan to let users customize screens for component-based functions to suit their working preferences, you must assign at least one of the Design Mode permissions to the user. If none of these permissions is assigned, the Design Mode menu option does not display on the Tools menu for that user. For details on customizing screens, see
QAD System Administration User Guide.