Creating a Self-Bill in Self-Bill Maintenance
You usually use Self-Bill Auto Create or Document Import to create a self-bill. However, you can also use Self-Bill Maintenance to manually create a self-bill.
In the program header do the following:
1 Enter a new self-bill number.
Leave blank for the system to create a new number from the information in the Self-Billing Control.
2 Enter or select a customer bill-to address.
On a new self-bill, information defaults for Response Date and Currency.
3 Edit Transmission, Response Date, and Amt Control Total as needed. Choose Next.
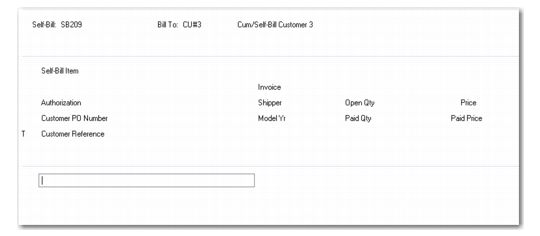
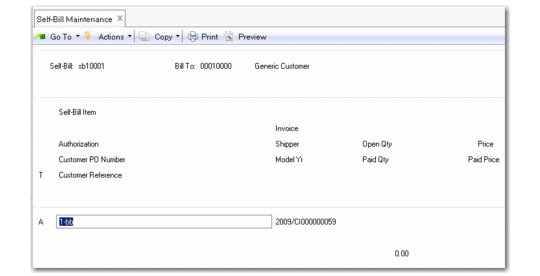
A self-bill line selection frame is displayed.
Self-Bill Maintenance, Line Selection Frame
Follow these steps to create a self-bill line:
1 Right-click the blank self-bill line and choose Insert to insert a line.
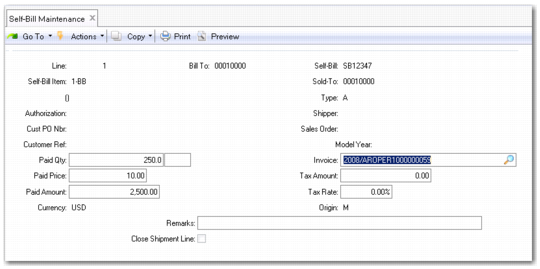
The self-bill line edit frame is displayed.
Self-Bill Maintenance, Line Edit Frame
2 Enter the Self-Bill Item or Sold-To.
3 Enter any other identifying information available. If you enter an item number associated with a customer item in Customer Item Maintenance (1.16), the customer item number is displayed below the Self-Bill Item field.
When you choose Next, the system matches shipment invoice records based on the information in these fields.
For Type:
• Leave blank if entering a shipment line.
• Enter A for an adjustment line. Use this code when creating an adjustment line to reference a write-off.
• Enter C for trailer charges line.
• Enter D for discount line.
• Enter T for tax line.
• Enter L for line charges line.
• Enter X for container charges line.
4 When the system finds multiple matches for the information you enter, a shipment selection frame is displayed. Use this frame to select the correct line.
• Use the arrow keys to scroll from line to line.
• Press Enter to select the correct line.
If only one match is found, or after you select the correct shipment line from the line match frame, the financial detail frame is displayed.
5 Enter or edit financial details and remarks for the line. Choose Next.
6 Matching shipment information is displayed in the last frame.
Working with Self-Bill Lines
The self-bill lines that are created in Self-Bill Auto Create (27.6.12.4) or Document Import (35.1) must be modified to correctly reflect what has been paid on each self-bill. The lines on the newly created self-bill include the entire unpaid quantity and expected price.
After using Document Import to process EDI self-bills, use Self-Bill Maintenance to reconcile any adjustment lines. After using Self-Bill Auto Create, you are automatically brought to the Self-Bill Maintenance header. See
Matching Adjustment Self-Bill Lines.
Once the header information has been entered into the Self-Bill Maintenance header or you have finished the initial auto-create procedure, the line selection frame is displayed. Use this frame to edit, delete, or add new self-bill lines. Use this frame also to link adjustment self‑bill lines to shipments, which in effect changes self‑bill adjustment lines to shipment self‑bill lines.
To modify self-bill line details:
1 Select the self-bill line to modify.
Self-Bill Maintenance, Line Selection Frame
Use the arrow keys to navigate up and down the self-bill lines. Press Enter to select the line to be modified.
The self-bill line edit frame is displayed.
Self-Bill Maintenance, Line Edit Frame
2 Add or modify the fields according to the information from the EDI file or the customer remittance advice document.
Note: The field values entered in the Line Edit frame are the same values displayed in the Line Selection frame. When entering a new line, you must enter values. When editing an existing line, the values displayed were defined when the line was originally created.
Self-Bill Item
This is the item referenced on the customer remitted correspondence—either the customer item number specified on the scheduled or discrete sales order line or your internal item number.
If specified on the sales order line, the customer item number takes precedence over your item number.
Type
This indicates the code identifying this line type.
Authorization
This is the authorization number sent by the customer to identify a shipment. Release Authorization Number (RAN), Dealer Order Number (DON), and kanban numbers are some examples of authorization numbers.
During the addition of detail lines, you can enter an authorization number to select shipments from the shipment-invoice cross-reference table.
Invoice
This is the invoice associated with this line.
When this self-bill line is an adjustment line and Invoice is left blank, an unapplied pre-payment is created for the amount referenced.
Open Qty
The line selection frame displays the quantity not yet paid on any self-bill. This field applies only to shipment self-bill lines and does not display for adjustment self-bill lines. Open Qty is expressed in terms of order unit of measure.
Paid Qty
Enter the total number of items that have been paid for.
Price
This is your listed price for the item.
Paid Price
Enter the price paid by the customer for each item.
Matching Adjustment Self-Bill Lines
Follow these steps to match adjustment self-bill lines with corresponding shipment information:
1 Go through the self-bill line modification steps outlined on page
here.
2 Select the adjustment self-bill line to match.
The self-bill line detail edit frame is displayed with all the adjustment line details.
3 Select Matching from the menu.
The shipment information frame is displayed.
4 Navigate to the corresponding shipment.
5 Press Enter to match the shipment with the adjustment line.