Update the Source Schema
In the next section, your source database is updated with a delta schema file that results in a QAD Standard Edition schema updated to the current service pack level. First an existing schema file is selected, copied, and modified to include your domain.
Depending on your source version and whether you have taken advantage of structure files to optimize your data files on disk with later Progress versions, you have two choices of delta file for your source version. Both types of delta .df file are located in TVInstallDir\ inplace\progress.
Storage Areas
In the \storagearea subdirectory are delta .df files that you can edit to optimize your new schema to specific-sized locations on your disks.
Schema Area
In the \schemaarea subdirectory are delta .df files that place the new schema into the default schema area used for non-structured database files.
Warning Make sure you know the correct version and release for your source database. Using the wrong .df file will result in errors.
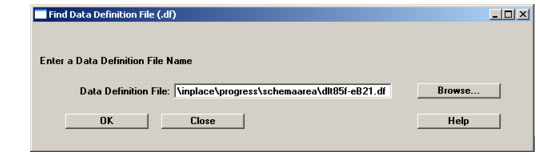
1 After you close the Log Window following the special dumps, you select the appropriate delta file for your source version from the \storagearea or \schemaarea directories and choose Open. The file path displays in the Find Data Definition File screen. Choose OK to create the new delta file for your environment.
Find Data Definition File Screen
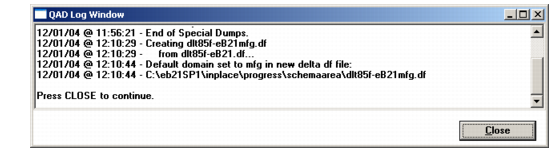
2 The Log Window displays, showing file creation progress.
Delta .df Creation Log
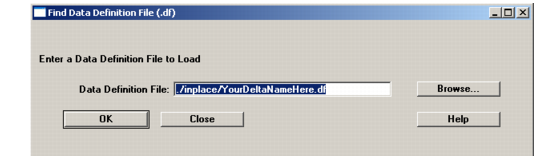
3 When it completes, choose OK to continue. The Load Data Definition File screen now displays. It looks just like the Find Data Definition File screen in
Find Data Definition File Screen.
Delta .df Load Screen
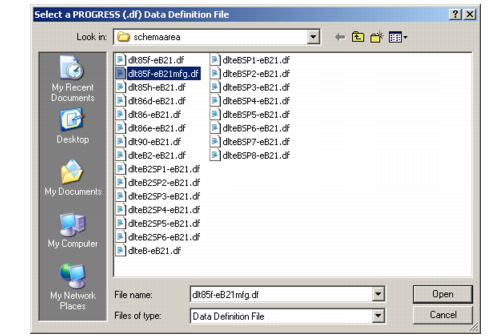
4 Select Browse to locate the new delta
.df file, named
Original_df_nameDomain_name.df. The correct file name and location are displayed in the Log Window, as shown in
Delta .df Creation Log. For example, if you selected
dlt90-eB21.df for a domain named qad, the resulting
.df file is
dlt90-eB21qad.df.
Selecting the New Delta .df File
5 Choose OK to return to the Find Data Definition screen. Choose OK to initiate the load.
6 The Log Window displays. The load screen displays on top of this showing progress. Close the Log Window when the load completes.