Creating a Sample Workflow and Adding Tasks
1 Go to the WF screen in the Windows UI.
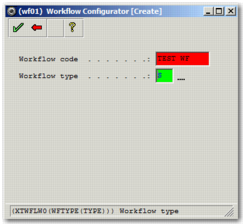
Workflow Configurator [Create] Window 1
3 Choose a workflow code and transaction type that the workflow is based on. This sample workflow relates to shipment transactions. Click the green check mark button.
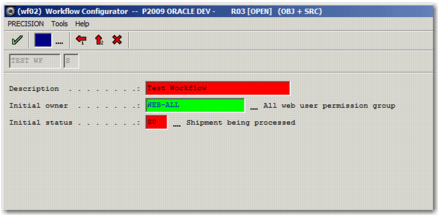
4 The system prompts you to enter a workflow description, initial owner, and initial status, as in
Manifest Tasks. Enter a meaningful description and choose the initial owner and status.
Workflow Configurator [Create] Window 2
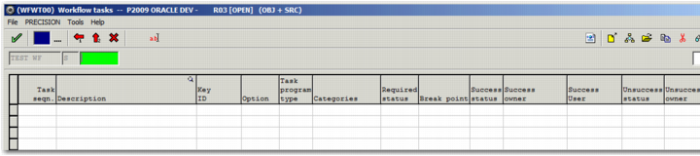
5 Click the green check mark button. The Workflow task list screen appears. Initially, this is empty.
Empty Workflow Task List
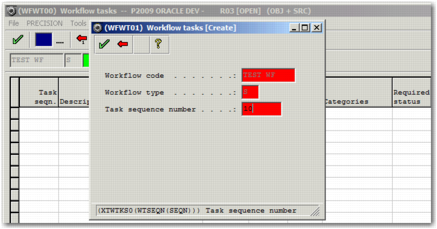
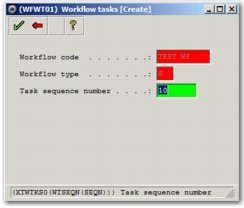
6 Press F6 or click the Create a new entry button in the top right corner. The Workflow Tasks [Create] window appears.
Workflow Task [Create] Window 1
7 The Workflow code and Workflow type fields are already filled in. Enter a Task sequence number; choose a low number for the first task, and higher numbers for later tasks. Click the green check mark button. A new window appears, allowing you to enter more details about the task.
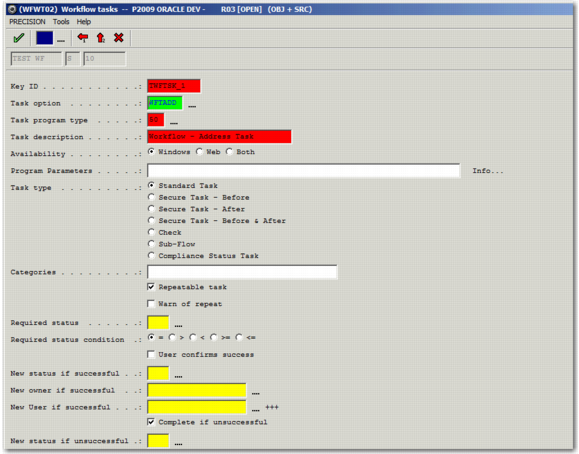
Workflow Task [Create] Window 2
• Choose a meaningful Key ID, which is a unique identifier for the task.
• Enter the desired option code in the Task option field.
• Enter a meaningful task description.
• Specify that you want the tasks to be available in the Web UI.
• Leave all other fields unchanged.
9 Click the green check mark button. The initial Workflow Tasks [Create] window appears again.
Workflow Tasks [Create] Window 1
10 Overwrite the Task sequence number with a higher number for the next task.
11 Click the green check mark button to move to the second Workflow Tasks [Create] window.
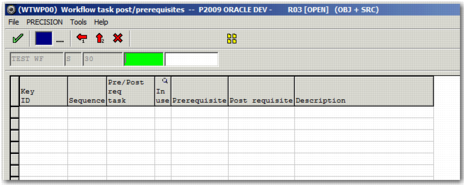
13 Click the green check mark button to save the task. The post and prerequisites screen appears. This happens when a workflow contains more than one task, and allows you to specify that one task is a pre- or postrequisite of another. The sample workflow does not require any pre- or postrequisites.
Workflow Task Post/Prerequisites Screen
14 Click the green check mark button to return to the initial Workflow Tasks [Create] window.
15 Repeat steps 10 to 14 until all of the tasks in
Business Process and Tasks have been created. After you create the last task, and are taken to the initial Workflow Tasks [Create] window, click the red back arrow button to return to the Workflow Tasks screen, which now contains your complete list of tasks, as in
Completed Workflow Tasks Screen.
 on the top right of the screen. The Workflow Configurator [Create] window appears, as in Workflow Configurator [Create] Window 1.