Defining Reports
Begin defining a report by establishing analysis codes, row groups, and column groups. Once these have been defined, use Report Maintenance (25.17.9) to define what should appear on the report and how the report should look. Once you have completed the definition, you can run the report.
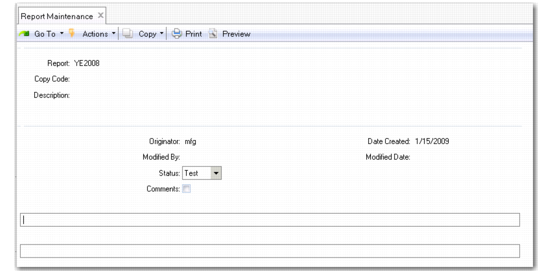
Report Maintenance (25.17.9)
Report
Enter a unique report name.
Copy Code
Optionally, enter the name of an existing report that you want to base your new report on. The system copies the entire definition of this report. Then you can modify it as needed.
Description
Enter a brief description of what the report does.
Status
Enter Test or Live. Initially enter test, then change to live once you have successfully generated a report. This field is for reference and has no effect on system processing.
Comments
Enter Yes to add notes.
Maintenance Security Groups
Leave blank to let all users modify the report definition. Add security groups to limit access.
Note: If you use these fields, make sure to add your own user ID.
Report Security Groups
Leave blank to let all users run this report. Add security groups to limit access.
Report Maintenance, Second Frame
The only required fields on this screen are Row Group and Column Group. The other fields let you set up a controlling hierarchy for the report and control the report format. See
Using Controlling Hierarchies.
Control Report By
Enter the type of GL code—account, sub-account, cost center, project, or entity—to which the controlling hierarchy analysis code applies. This field activates the controlling hierarchy feature and determines the type of analysis code you can select in Using Analysis Code.
Using Analysis Code
Specify the analysis code used to set up a controlling hierarchy. See
Analysis Codes.
Continuous Page Numbers
Enter No to restart page numbers for each controlling hierarchy group.
Row Group
The code that uniquely identifies a row group.
Column Group
The code that uniquely identifies a column group.
Row Labels Before Column
Enter a valid column number from the selected column group to specify where the row labels print. Labels print to the left of this column. To print the labels to the right of the last column in the group, enter 9999. Enter LAST to right-justify the labels.
Format
Enter the global format for cells that allow format override. The system defaults from the format specified in GL Report Writer Control.
Zero Suppression
This field controls printing from rows when every column in the row evaluates to zero, and when the zero suppression setting on the row allows the report to take control. Enter one of the mnemonics shown in the language detail pop-up window.
Rounding
The rounding method for this report.
Top, Bottom Margin
Enter the number of lines to leave blank at the top and bottom of each page.
Left, Right Margin
Enter the number of spaces to leave blank at the left and right sides of each page.
Change Global Query Specs
Enter Yes to display the optional Global Query Specifications screen. If there is no data in the optional screen, the default is No. Otherwise, the default is Yes.
Edit Report Title, Footer
Enter Yes to display the report title and footer screens.
Edit Page, Report Footer
Enter Yes to display the page and report footer screens.
Printer Template
The printer definition used to validate report parameters. Enter a defined printer.